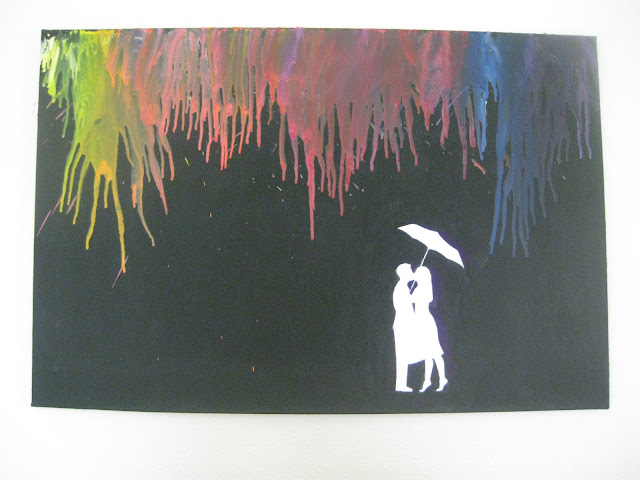
Fellow Pinners! We've all seen those cool canvases with the melted crayons but rarely is there a testimonial on whether the pin actually works or not, or even instructions on "how to". I found this extremely frustrating so I decided to wing it and see if it worked out. And it did! It's much easier to do than I thought it would've been, but it also required a lot more crayons than I had previously expected.
First thing I did was paint the whole canvas black. I then bought a pack of crayons, I think for this specific canvas I bought a 30 pack of crayons from Michael's. However, if your plan is to only use different values of one color range (for something like flower stems) you may have to purchase more than one pack of crayons. Once I had my crayons I lined them up in the order I wanted them, but even with all the crayons I had purchased it only reached half way across the canvas. Since I was planning on only melting my crayons half way down my canvas I figured I probably didn't need a whole crayon for each line of "rain", so I broke them in half which doubled the length of the line I had already created. This made my line of crayons stretch all the way across the top of the canvas.
Now that my crayons were all lined up I taped them together with masking tape. This can be kind of tricky if tape gets stuck to your fingers as much as it gets stuck to mine. It's frustrating, but you can persevere through it!
Once I had my crayons taped together I figured I was ready to pull out my hairdryer and start melting the crayons but this was not the case. I didn't have any structure to support my crayons while I melted them. So I used the cardboard holders inside the crayon box to support my line of crayons.
<---------------Just line these four cardboard crayons holders up and tape them to the back of the line of crayons. This way the cardboard holders will rest on the edge of the canvas while the end of the crayon hangs just over the edge of the top of the canvas.
After that you just have to be patient and use a hairdryer to heat up the crayons. I suppose on a hot sunny day you might be able to just leave it outside and let the sun do all the work, but you won't be able to control the lengths of the melting crayon like I was able to with the hairdryer. However, when using the hairdryer you may want to melt the crayons at intervals. It can take a while and my hairdryer started to get pretty warm in my hands. I didn't want it to overheat, so I had to stop every once in a while and give it a break.
Once the crayon meltings had dried all that was left was to put the two figures and the umbrella at the bottom of the canvas. I found their silhouette online, printed it, cut them out, and mod podged them onto the canvas. As long as you use regular printer paper you shouldn't have a problem with bubbles showing up when it dries.
And just like that you're done! Good luck with your own crayon melting!
~Crafty Girl~


No comments:
Post a Comment